| NZXT Rogue Crafted Series SFF Gaming Case |
| Reviews - Featured Reviews: Cases | |||||||||||||||||||||||
| Wednesday, 09 January 2008 | |||||||||||||||||||||||
NZXT Rogue SFF Gaming CaseAs an Enthusiast I have considered several Small Form Factor (SFF) cases to host my gaming system, and I can comfortably state that a large number of members of the gaming community consider SFF cases as well. But in my case, full or mid tower cases have always been my choice due to higher cooling potential because of better airflow which they have been known to offer. Benchmark Reviews has the new NZXT Rouge Crafted Series SFF gaming chassis in our hands, a chassis which focuses on key-points such as higher cooling potential, supporting larger power supplies, and most importantly hosting the highest-end of gaming cards with no size restrictions. Please join us as we explore NZXT's newest addition to Crafted Series of gamer cases. NZXT Rouge series is really unique, and it stands out when compared to the products offered by competing companies. NZXT has come a long way in the past few years, and have been hard at work in the market competing with some big names in the industry which have been around a lot longer. From the time I laid my hands on the NZXT Rogue, I couldn't wait to find out how this case stood against other cases that I have had a personal experience with.
Introducing the performance gaming SFF chassis from NZXT, the Rogue, built with an 3mm aluminum frame and fitted with the best cooling possibilities like five 120mm fans, the Rogue offers the best performance and quality for M-ATX gaming systems. Tailored for LAN parties, the Rogue comes standard with a carrying strap, capability for four hard drives and long video expansion cards like the NVIDIA 8800GTX. High performance parts also means a high wattage PSU so the Rogue was also designed to hold high wattage 750W power supplies through the use of an extension bracket. All the components inside can are also protected by the sturdy frame and a locking mechanism to insure maximum security. NZXT has designed the Rogue to offer the best cooling, craftsmanship, expandability in this range of chassis. About the company: NZXT
NZXT, a company built upon gamer's dreams, hopes to create products that put consumers first. Our objective is to provide every gamer with a case that they can identify with. Combining unique design and case performance, consumers will finally be able to find a quality case that will represent their own style and personality. NZXT Rouge Features
3mm Outer Aluminum Frame protects and guards your internals from damage during LAN parties and transportation
Support for high end large video expansion cards
Open top window allows view of your system
Carrying Strap for LAN Go-ers and moving the PC
Supports ATX PSU and expands for larger PSU over 700W and all NZXT PSUs up to the Precise 1200W
Locking Door Mechanism for security at LAN events
Weight reduction through aluminum chassis
Great ventilation and cooling with 5 120mm fans
Removable Motherboard Tray
Supports E-SATA, Mic, Audio-in, 2 x USB 2.0
ROGUE Crafted Series Specifications
NZXT Rogue: ExteriorIt appears that the NZXT Rogue SFF case is an average size SFF gaming case, something that I am used to seeing at my local Fry's Electronics store. Once I had taken it out of the box, I was actually amazed how spacious it looked. After having the first look at the exterior I couln't help but imagine what this case had to offer in terms of functionality.
The retail box was much bigger than I expected for a SFF case, because the case was packaged very well with protection on top and bottom. All the accessories were stored inside the case like most other cases that I have purchased over the last few years.
As shown in the image above, the NZXT Rogue could be carried with the included strap. It simply wraps around the NZXT Rogue, and then it is carried on your shoulder if attending a Lan-Party.
After opening the front door you are able to access the CD-ROM and Floppy Bay, as well as the Power and Reset Button. The front USBs are accessible without opening the front door, which is convenient.
Here you can see what it looks like with the front closed. The case really has a nice black finish to it as you can see, but the downside is that the NZXT Rogue is a fingerprint hog. I however could not hold that against the NZXT Rogue, because anything with a nice black finish ends up this way. If you have a PS3 you probably already know what I am trying to imply.
This is the view of the side panel where you can attach two 120mm fans of your choice on each side. I really didn't like the fact that you have to unscrew the side panel everytime you remove it.
I really loved that everything was labeled. It is to be noted that not all the NZXT products come with accessories pre-labeled. It was really nice during the installation process to know which screws to use where, since this is not a normal ATX case. Rogue Detailed Exterior FeaturesThe NZXT Rogue has very unique look. It has a very appealing exterior design, which I personally like. The front panel has a locking mechanism, so nobody can turn on the system other than you. I certainly like the feature but personally I have never used the key, and I don't know if others are that comfortable locking their system and then potentially misplace that key. It is a nice feature to have but most certainly not the most demanded feature by consumers. I can understand a locking mechanism for the side panels on cases but not the front panel.
Here in the image above are the front panel I/O ports. The NZXT Rogue SFF gaming case only comes with 2 USB ports in the front it would have been nice to see at-least four since most of the newer chipsets support at-least 8-12 USB ports. The front panel also includes the front audio jacks and an e-SATA port which internally connects to your motherboards SATA port.
Removing the top panel is the easiest task of all, as all you have to do is remove one thumb screw shown above and pull it towards you and lift it up to remove it.
Here is the top panel separated. The see-through window on top really is neat. It gives you a top view of the inside and the rear fan.
I really liked the power and reset button on the NZXT Rogue, as they have a nice finish and really stand out on black. Closer Look: Rogue InteriorIn this section we will have a look at the interior of the NZXT Rogue, which would allow anyone to see the expansion capabilities of this SFF gaming case. The Rogue will hold up to 4 hard drives through the provided cage space. Also, the Rouge has more than enough room to fit almost anything that you could in a regular case other than a regular ATX motherboard.
Moving on to the interior of the NZXT Rogue, you can see the CD-ROM, HDS installation bays from the image above.
The rear exhaust fan and the side exhaust fan on the side panel are viewed in the screenshot. The side exhaust fan is pre-mounted right next to the CPU to exhaust the hot air out of the NZXT Rogue.
NZXT Rouge's mounting holes are preinstalled so you don't have a trouble yourself with those. I am sure you will notice the unused space under the installation bays. Enough to comfortably insert a regular ATX motherboard under there, but it only fits a m-ATX board afterall.
The Rogue also comes with one intake fan and has room for another one if needed. Its nice to see the dust filters pre-installed on the side intake panel.
The tray comes out fairly easily after unscrewing four thumb screws. This is really a plus but we will dig deeper in to this particular area as you read on to point out the Pros and Cons of this particular case feature.
Pictured above is a clear shot of the CD-ROM and Floppy Drive bay. You can install either a floppy or memory card reader, but I personally prefer having the option to install both. The unused space could have been utilized if one wanted to further expand their system's installation capability. Rogue Detailed Interior FeaturesIn this particular section we will take a detailed look at the interior features of the NZXT Rogue Crafted Series SFF gaming case. The Rogue comes with a removable motherboard tray, and it supports up to five 120mm fans to cool the internal components. The Rogue also supports the latest (and longest) graphics cards, which should give it a significant edge over the competition.
The motherboard tray removal, as stated before, was a fairly easy task by removing the four thumb screws. It has a really nice finish to it and the mounting holes were pre-installed.
The installation of the CD drive and Floppy drive were probably not the most time consuming, but certainly the most annoying task of all. In order to install the drives you would have to unscrew four screws to remove the whole front panel. There are two screws on each side: one on top and one on the bottom on each side.
Above is the front cover laying face down. The only reason you would have to take the whole front panel off is only to unscrew the screws on the bay covers, otherwise the drive would slide in easily without having to remove the front panel.
I have to say it doesn't look so pretty with the front panel removed. I have never had to make so much mess to install my CD drives.
The Rogue provides users with 2 front panel USB's, Audio ports and an e-SATA connection that internally connect to your motherboards internal connections. NZXT Rogue InstallationIn this section our readers will get to look at the inside of the NZXT Rogue and what it looks like after the installation has completed. I personally think this is a highly informative part of my review. I have included images, which I thought would give our readers detailed look the installation part of the NZXT Rogue.
Installing the hard drives was by far the easiest step during the installation; just slide in the hard drives and screw them in. It just doesn't get any easier.
It was a pain installing the video card. While I really do not know how to explain it , one could only really understand after experiencing it on their own. However I would try to do my best: My 8800GTS required more room for installation. I had to pull the tray out just a little to give it enough room for installation. You are probably asking yourself, "why didn't he just install it outside the NZXT Rogue when the NZXT Rogue has a removable motherboard tray". Well I simply could not because the CPU cooler that I had installed would not allow me to pull the tray out. If you are using stock cooler than you should have no issues at all. Graphic card installation made me feel as if I need more than two hands, and it was probably the most annoying experience of the article.
I took this picture to show you how close the large CPU cooler is to the PSU bracket. I had the Hyper-120 by Cooler Master, and I could not install the cooler any other way otherwise it would interfere with the power supply installation.
It does get crowded in a small form factor space, but I am happy with the fact that this is probably the only case than can handle such large components. Although it required some sacrifices from me, and one of those sacrifices was the loss of airflow of the CPU cooler outside the NZXT Rogue. I had to settle with the air blowing towards the graphic card.
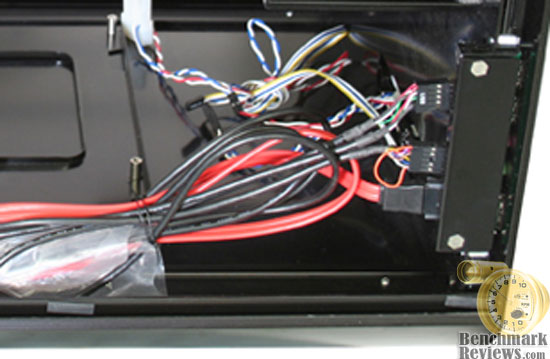
In here you can see that the NZXT Rogue appears to have room to spare, that is only because 1000 watt PSU is yet to be installed, after that I could not even place my hand on anything under it.
Thanks to NZXT for the provided PSU bracket I was able to gain an extra inch or so that I needed for the PSU's modular cables. An inch and a half might not sound much but under such circumstances it could mean no large power supply, which is a big let down for any gamer if they have a powerful system. Crafted Series Final ThoughtsFirst of all, I would like to clear up why there weren't any pictures of installed components on the removable tray outside the NZXT Rogue. The simple answer is that I wasn't able to. The removable motherboard tray is limited in features, you can only do installation outside the NZXT Rogue if you have a stock CPU cooler; otherwise you won't be able to slide the removable tray back in the NZXT Rogue. This was personally a big let down for me. The first suggestion I would like to offer is combining the rear exhaust fan with the removable tray so when you remove the tray there are no clearance issues for large heatsinks. As I have experienced with most Mid-Tower or Full-Tower cases, it proves to be a lot less painful for the consumers. As I am sure most gamers don't use Intel stock heatsink if they want to overclock their systems, and there are a few Micro-ATX boards available on the market that allow for far greater overclocks than previously accounted for. The ASUS P5E-VM HDMI motherboard was the board used for this particular system, and I was able to get a successful overclock on my Q6600 to 3.2GHZ with the Cooler Master Hyper-120 CPU cooler. The V-drop on the board didn't allow any higher overclock on my particular board. The temps could have been better, I was close to 60C on my G0 stepping Q6600 at 3.2 with all four cores loaded with Prime95. I was really happy with the temps after not being able to direct the CPU heat out of the NZXT Rogue. Although the temps were stable, they could have been better. I was really disappointed with one particular aspect of the installation, as I really like to have airflow going out of the NZXT Rogue and I am sure most of the enthusiasts do as well, especially in a SFF chassis. NZXT Rouge is by no means is a small case, it is much bigger than any other SFF chassis I have ever seen. This case is really wide, and I would not have minded another inch on each side. This would have done wonders and probably would have been able to install the CPU cooler directing the heat outside the NZXT Rogue, especially the side exhaust fan being right next to it. The CPU temps were higher due to that particular problem and I was able to improve it by simply taking off the top panel, and the CPU temps went down an amazing 6C. So that proved to me that there was too much heat staying inside the NZXT Rogue, especially around the CPU area. One could certainly have a different experience with the NZXT Rogue if used with the stock cooler or a medium size air cooler, but it should be able to accommodate all coolers without any restrictions considering the size of the NZXT Rogue. After I first received the NZXT Rogue I wondered if I could fit an ATX case in there, I can not count that against NZXT as this case is meant for small motherboards, but It would have been a wonderful option that one could hardly resist. As I stated before it only needed an inch on each side to be able to accommodate regular ATX motherboards. I was able to determine this by simply putting a spare ATX motherboard inside the NZXT Rogue. Even though it may seem as If I am totally unsatisfied with the Rouge series of chassis, however that is certainly not the issue at all. I really loved everything about the NZXT Rogue other than a few areas I would like see NZXT really hit the spot on. I believe NZXT has "winner" written all over it, and with only a few improvements it could get better and win even more hearts. I do have a system running in this case and I am really pleased with the results. NZXT's Rouge series of chassis accommodates the highest end video cards and highest end power supplies, and I would also like to see highest end motherboard added to that list. This case could easily fit an ATX motherboard, and I would really love to see it do just that. Maybe in the next revision of the NZXT Rogue I hope NZXT will only make it better. Consumers might not care about these improvements, but in this particular field we at Benchmark Reviews have to analyze the product from all angles and suggest the improvements (if any) that would benefit the consumer and also improve the product quality. However suggestions are only for the future recommendation, I can not count the suggestions against the NZXT Rogue because the NZXT Rogue was never meant to be that way, but it easily could have been a case that I could imagine holding my next high-end rig with a regular ATX motherboard, that could even allow our readers to go Sli or Crossfire X if needed. Conclusion: NZXT RogueThe NZXT Rouge SFF chassis is a case that really impressed me from the beginning. I loved the size and the room that was available to me to work with. It is a great looking case that could sit right on top of your desk and impress anyone that looks at it. The construction is very solid and really high quality finish in and out. The case is not as light as the other SFF cases but looking at the size it is not that heavy either. NZXT has crafted a very high quality product when it comes to construction. The case provided adequate cooling performance for the system components, which could have been better had I been able to direct the CPU heat outside of the NZXT Rogue. You can have up to 4TB of internal storage considering the fact that the largest hard drive available to an average consumer is 1TB and the Rogue has four HDD bays. NZXT Rouge has only just become available for purchase, and NewEgg presently offers the best price of $139.99 for the blue LED at the time of this review. NewEgg also offers the red LED version for $149.99. I would like the prices to be a little less expensive, maybe for around $100-120 it could be a better value. Overall I can recommend this case to someone who wants a SFF chassis that could hold any graphics card available to-date, and simply give you the best compact gaming rig you can imagine which would sit easily on top of your desk. Pros:
+ Holds any graphics card to date Cons:
- Front Panel removal required to install CD-ROM or Floppy drives Ratings:
Final Score: 8.3 out of 10.Questions? Comments? Benchmark Reviews really wants your feedback. We invite you to leave your remarks in our Discussion Forum.
Related Articles:
|
|||||||||||||||||||||||


Comments
First question I got was the graphics card. Yes, it will fit any giant graphics card with no problem. Even multiple graphics cards.
I've fitted it with a "Icy Dock MB994SP-4SB" in one of the 5,25" holders (DVD size).
In that there are 4 SSD drives in RAID 5. Main storage is 4*2 TB in RAID 5. The hard drives are mounted next to the intake fans in two stacks of 2, the trick is to move the inner drive one step out to give better cooling.
I changed all the fans to quiet "Gentle Typhoon".
It's compact, looks awesome and faster than fast.
You just have to read the manual and put each component in place in the right order, bacause the compact format gives you a tight fit.
The greatest upside is that you have 5 120 mm fans cooling a computer with half the air volume of your average midtower. It runs like a submarine, cool and quiet.
I love it to bits, if you can find one, BUY IT!