| Corsair Carbide 400R Computer Case |
| Reviews - Featured Reviews: Cases | |||||||||||||||||||||||
| Written by David Ramsey | |||||||||||||||||||||||
| Wednesday, 14 September 2011 | |||||||||||||||||||||||
Corsair Carbide 400R Case Review
Manufacturer: Corsair Full Disclosure: The product sample used in this article was provided by Corsair. It's easy to build a great computer case if it's going to retail for $250 or more. Actually, I take that back: judging by some of the cases I've seen, maybe it's not that easy! While a high retail price is no guarantee of quality or usability, it's certainly more of a challenge to come out with a really great case at the $100 price level... but that's not going to stop Corsair from trying. In this article, Benchmark Reviews tests the Corsair Carbide 400R computer case. Corsair's first case was the amazing Obsidian 800D, quickly followed by the windowless 700D, which we reviewed here. These cases have a number of innovative features but are also very expensive, which limits their appeal. The Carbide series of cases is Corsair's least expensive case lineup, coming in below the Graphite and Obsidian series. But this is a very crowded market segment, with dozens of models available from companies like Antec, Lancool, NZXT, and others. The $100-and-under market represents by far the largest segment of the case market, and Corsair's got their work cut out for them if they expect to make an impact here. According to Corsair: Corsair Carbide Series mid-tower PC cases have the high-end features you need, and nothing you don't. Designed to be the foundation of awesome yet approachable gaming PCs, they combine the latest technology and ergonomic innovations with lots of room to build and expand, and amazing cooling potential. 
CC9011011-WW Specifications
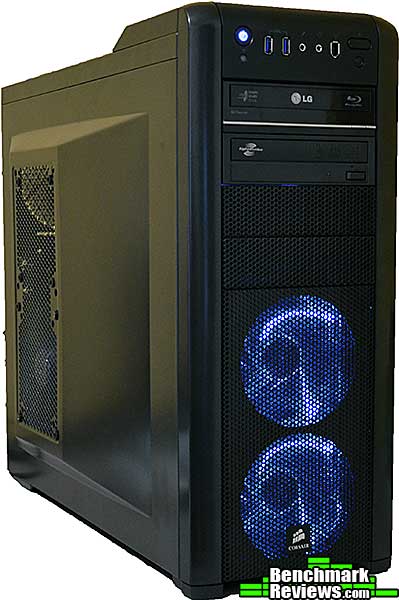
Let's take a look at this new Corsair case in the next section. Closer Look: ExteriorOne thing you won't get in a $100 case is any money spent on a fancy colored box. Corsair's "plain brown wrapper" has marketing prose in six different languages.
Out of the box, the first thing you'll notice about the 400R is the bulge in the side panels. You can mount two 120mm or 140mm fans inside the left panel to help cool the interior of the case.
The rear of the case brings another surprise: eight slots! This is a rarity in many much more expensive cases, but great to have if you're setting up an SLI or CrossFireX system. The 120mm rear exhaust fan can be replaced with a 140mm fan if you choose, and there are four large grommeted holes for external water cooling systems.
The right side of the case has the same large bulge that the left side does, without the fan mounts. This will come in very handy during the build, as you'll see.
The accessories bundle seems minimal: after opening the taped-shut box, I found only a USB 3.0 converter cable, a folded single-page manual, and a plastic bag with a few zip ties and cable holders. The converter cable lets you connect the case's front USB 3.0 ports to a USB 2.0 header if your motherboard doesn't have a native USB 3.0 header. But shouldn't there be some screws and stuff?
I'll take a more detailed look at the outside of this case in the next section. Detailed Exterior FeaturesThe top of the case shows a mounting area for two 120mm or 140mm fans, or a 2x120/140mm radiator. Corsair says their own H100 water cooler will fit just fine, but also says that third-party radiators should be no more than 15mm thick. I couldn't find any radiators that thin, so you may be limited to the H100. Of course you could mount the radiator outside the case and run the hoses through the ports on the back. There's a slot in front of the radiator area that's easy to use as a handle, although I'm not sure if it's sturdy enough to hoist a fully loaded system.
The Carbide 400R has a simple front panel. Starting from the lower left and moving clockwise: the white drive activity LED, the power switch, two USB 3.0 ports, the microphone port, the headphone port, an IEEE 1394 (FireWire) port, the fan light toggle, and the reset switch. The 400R's front 120mm intake fans have white LEDs, but you can turn these off with the LED toggle switch.
At the front of the case we see the four 5.25" bays and the two white LED-lit 120mm fans. One feature missing is the ability to mount a 3.5" bay device. You could physically mount one with a third-party adapter, but there's no front panel cutout for it.
The front bezel snaps off easily, and there are no wires connecting it to the rest of the chassis. A coarsely perforated plastic sheet acts as a filter for the two fans. It's not easily removable, so you'll want to clean it by blowing it out with compressed air.
At the bottom of the case we see four plastic feet with rubber inserts, and the air intake area for the power supply and an optional bottom fan. A removable fine fabric filter slides out for easy cleaning.
Now let's take a look at the inside of this case. Closer Look: InteriorBoth side panels are secured with captive thumbscrews, a nice touch. I've seen some cases that use thumbscrews on one side and screws on the other, presumably to save a nickel or so in production costs.
Take a moment to examine this, because this is where this case excels: note the fully painted interior, the four large, grommeted cable routing holes, the pre-installed motherboard standoffs, the six hard drive bays, and the overall spaciousness of the interior. 3.5" hard drives snap into the plastic drive sleds without any screws; all card slot covers use thumbscrews, and the 5.25" devices automatically lock into place when you slide them in. Also look at the CPU cooler mounting hole in the motherboard...I think this is the largest one I've ever seen!
There's a mounting area for a 120/140mm fan directly in front of the power supply, but even the tidiest case will probably have enough cables in this area to significantly obstruct any airflow from a fan there. The hard drive cage is not removable.
Behind the motherboard tray, I found several plastic packets containing screws and motherboard standoffs, which you can see on the lower corners of the image below. How they escaped from a taped-shut accessories box is a mystery! Notice the square cutout at the upper right of the motherboard tray: this is for your EPS 12V power cable. It's amazing how many cases with bottom-mount power supplies omit this. One thing I'd like to see more of is tie-down points. While there are a few near the grommeted cable pass-through holes, there are none under the main motherboard area.
Looking at the back of the case, we see the power supply area, eight card slots, four hose pass-throughs, the I/O back panel area, and the included 120mm exhaust fan. 
Let's take a closer look at some of the interior features of this case in the next section. Detailed Interior FeaturesThe 5.25" bay uses tool-less latches, but these are "automatic": when you slide a device in from the front of the case, they automatically lock down when the device is in the correct position. You release the latch by pushing the front tab in the direction indicated by the arrow. This is a clever mechanism (who hasn't gritted their teeth while sliding an optical drive back and forth in millimeter increments while trying to secure a tool-less latch?), but has the disadvantage of securing your device by only a single peg fitting in a hole, which leaves it rather loose. You can of course fit a screw or two to the other side.
The six plastic drive caddies are the same used in many other Corsair cases. 3.5" drives simply snap in; 2.5" drives require the removal of one side of the snap mechanism, and must be secured with screws. 
Modders rejoice! The entire top panel is secured with screws and can be easily removed.
There's about 6 3/4" of space between the motherboard tray and the side panel, which should provide enough room for even the largest coolers, especially considering the bulge in the side panel, which provides about another 1/2" of room.
Behind the motherboard tray, there's about 3/4" of clearance. Again, there's actually even more than this, since the side panel's embossed area adds another 1/2" or so at its greatest point. You won't be forcing a panel on against compressed cables with this case! 
So far, this case looks really impressive. But how is it to build a system in? Follow me to the next section to find out... Building a SystemThe Corsair Carbide 400R is a mid-tower case, and traditionally these have rather tight interiors. To really test it, I decided to move my entire Intel system, comprising an ASUS Rampage III Extreme motherboard and two NVIDIA GTX580 graphics cards, one SSD, three hard drives, two optical drives, and a 3.5" card reader into this case. Initially it looked as if the motherboard would fit perfectly. 
However, the Rampage III Extreme is slightly larger than the standard ATX form factor. A standard ATX motherboard is 12" wide and 9.6" deep, but the Rampage III Extreme is 10.6" deep (which ASUS disingenuously calls "ATX form factor" on their web site). As such the SATA ports bump right up against the edge of the slightly recessed motherboard area. This makes it impossible to use the lower SATA ports. 
Well, this is why there are Dremel tools. After removing a few inches of metal I could easily access all the SATA ports, and a bit of plastic tubing covers the sharp metal edge. Realize that this is not a strike against the Carbide 400R as the specifications for the case clearly state it's for mATX and ATX motherboards only, and the Rampage III Extreme is not a standard ATX motherboard. 
There's plenty of room in back for all your cables. 
All my components fit easily, with room to spare...which makes me wonder why I'd need a larger case... 
I did run into two problems: first, the two right screw holes on my Corsair HX850 power supply didn't line up with the cutouts on the case. I solved this by using a razor blade to carefully shave a little material off the rubber power supply supports inside the case. This was probably a manufacturing glitch and I wouldn't expect to see it in another example. 
More perplexing was the problem I ran into trying to mount a couple of side panel fans: Corsair provides a package of 12 long fan screws, which the instructions specify can be used to mount a fan "in any position". These screws are just long enough to protrude through a standard 25mm thick fan as shown below.
The problem is twofold: one, these are machine screws, and Corsair doesn't supply any nuts to secure the ends of the screws (they're not listed in the accessories list in the documentation). Second, while the screw is long enough to make it through a 25mm fan, it's not long enough to make it through a rubber fan mount grommet, the case side panel, and the fan, so you wouldn't be able to use them even if nuts were supplied. Regular self-tapping fan screws won't work because their heads are too small and slip right through the grommeted holes provided in the side and rear panels; Corsair's own fans are mounted with self-tapping screws that have extra-wide heads so they'll work with the large screw holes in the case. I wound up using some rubber "pull through" fan mounts, which worked well enough to mount a couple of side panel fans. Corsair Carbide Final ThoughtsI was very impressed with the Corsair Carbide 400R case. Aside from a couple of minor quibbles, it's features-competitive with cases that cost significantly more, and there's little indication of the cost-cutting measures I've seen in other cases to reach a certain price point. The 400R is able to keep all my high-end components adequately cooled running stress tests (the side panel fans help with the GTX580s), and aside from the SATA port clearance problem with the motherboard (which I again note is not Corsair's fault, since the case isn't designed for the size of motherboard I used), everything fit easily. Corsair's grommeted cable holes and "bulged" side panels make cable management a breeze. I've never understood why so many other case manufacturers design cases with such minimal clearance behind the motherboard tray, as though they were unaware of the thickness of a standard ATX power cable. Add in things like a completely tool-free design, removable drive caddies, and eight card slots, and you've got an exceptional case for the money. Actually, you don't really even have to make the "for the money" argument: it's an exceptional case, period.
The only thing that bugs me about this case is the weird fan screw issue. I keep hoping I've overlooked something obvious, but I'm unable to figure out any way to use the provided fan screws to actually mount fans. Other than that, the only thing I'd wish for is the ability to mount a 3.5" device in one of the 5.25" bays, but even I admit that there are very few 3.5" bay devices out there these days. Corsair CC9011011-WW ConclusionAlthough we strive for objectivity here at Benchmark Reviews, please remember that each author perceives these points differently, and our conclusions and recommendations will necessarily differ from others. Also, prices can fluctuate and designs change after publication, so that the product we review might not have the same price and specifications of a product that's available later. Please do not base any purchase solely on our conclusion, as it represents our product rating specifically for the product tested, which may differ from future versions. Benchmark Reviews begins our conclusion with a short summary of each of the areas that we rate. The performance of the case was excellent. The extra fan mounts make it possible to house a very hot, high-end system in this case...provided you can come up with a way to mount them. Appearance is probably the weakest point of this case. It's certainly not ugly, but it's not very striking, either. This case's beauty is internal, and it's not something you'll notice when it's sitting on a desk. The lit front fans provide some measure of visual interest, but this is definitely a function-over-form thing. The construction of the case is top-notch. All the parts and panels fit perfectly, and all metal edges inside the case are rolled over. Having features like a front panel that snaps completely off without any trailing wires shows that someone at Corsair put a little thought into it. The only issue here was apparently a slightly-too-tall rubber power supply support, which caused a problem in fitting the power supply. Functionality is this case's strong point. Eight card slots, fully tool-less interior, six drive caddies, excellent cable management, lots of fan mounts...really, you'd have to think pretty hard to justify spending more money than this on a case. I guess the best way to describe the Corsair Carbide 400R is a phrase I've used a few times before: inexpensive, but not cheap. It's fascinating to watch companies start to seriously compete in the low end case market. As I said at the start of this review, it's easy to build a great case that sells for $250 or more, but considerably harder to build a great case that sells in the $100 range. But Corsair's done it. For $99.99 at Newegg, the Carbide 400R rates an exceptional value. Pros:
|
|||||||||||||||||||||||


Comments
Concerning the fan screw issue, let me know the thread pitch and I'll round you up some nuts and washers; in lieu of having the proper guages, contact me, send me a sample if available, and I'll fix you up.
just wondering..
thanks
This sentence may be missing a word.
____________________ ____________________ _
This case is a good deal as I see it. It looks to have a whole lot of functionality and that's where I think that it's beauty lies. I'm going to buy one of these and build my next system with it. Thanks for your review.
At least that's what I see now, and I haven't edited anything...
I go back and forth on the utility of filters on computer cases: they catch some dust, as I see on the cases I use that have them, but most cases are hardly hermetically sealed, and a lot of dust gets in anyway. Also, I made allowances for the $100 price point. In the end the design and utility of the case won me over.
The simple fact is that this is a $100 case and you get what you pay for. Want more filters? Buy a more expensive case, or purchase some after market filters (there are tons of them out there).
As for fan mounting, did anyone try the fan screws that come with fans? Are the heads too small or something? Couldn't use a washer?
For the reviewer, you could still clean up the cabling a bit more.
This case will hold any hardware you throw at it and keep it all cool at a very quite level. You simply can't beat this case at $100. Even if it cost $150, it would still be the best case out there!