| nMediaPC 6000B HTPC Computer Case |
| Reviews - Featured Reviews: Cases | |||||||||||||||||||||||
| Written by Nate Swetland - Edited by Olin Coles | |||||||||||||||||||||||
| Thursday, 08 October 2009 | |||||||||||||||||||||||
nMedia HTPC 6000BMore and more consumers these days seem to have some sort of home theater set up in which they incorporate a computer. Many people use a PC in their living room to watch slideshows of their photos, browse the web on their large HDTV displays, or use their pc as a fully functional Home Theater PC for movies, games, music, and etc. Along with this growing trend, the concept of using a HTPC style case for your living room computer is becoming more popular. People don't want some big ugly tower sitting in the middle of their living room, but would rather have a stylish looking case that can match the decor of their other home theater components, and offer many additional features useful to HTPC setups. Benchmark Reviews has the pleasure of checking out one of the HTPC cases offered by nMedia. This stylish and functional desktop ATX-style case boasts many features one would find useful in a HTPC setting such as a front LCD readout and front ports for things such as USB, Media Cards, Audio, eSATA, and Firewire, all in an attractive package that can easily match your other theater components.
nMedia shows us that it is possible to provide a feature packed HTPC case that has the looks and functionality of many of the more expensive cases, while keeping the cost down and the quality high. I had a goal of finding a HTPC case within a price point of around or under $100, and nMedia's 6000 series cases proves that it can be done. nMediaPC HTPC 6000B Case Features
6000B Specifications
About nMedia Systems, Inc.nMediaPC, or nMedia Systems, Inc. was founded in 2004 in Castro Valley of Northern California. They pride themselves in making high quality products aimed at the Home Theater market. They manufacture home theater products with simplicity and functionality in mind. They produce such products as HTPC cases like the 6000, and the HTPC 8000. They also produce a variety of media card readers, LCD readouts, and keyboards and mice aimed at the HTPC market. "Our vision is to transform the total home theater experience by intelligently converging digital entertainment AV functions, computer and networking technologies. We commit to deliver strong value to a number of key technology and entertainment market segments, including PC system builder and distributors, home theater installer and home AV system retailers." (nmediapc.com) Closer Look: ExteriorAs you can see, the exterior on this case looks amazing. They did a great job with the minor details to make sure that it is cosmetically appeasing, as well as allowing it to fit in seamlessly with a variety of home theater equipment.
The mirrored finish on this case is quite impressive. The mirror finish is only on the front, but that is really all most people will ever see. You can see the reflection of my phone in this picture showing off just how reflective it is.
We see here the front panel opened. It boasts a variety of inputs from USB, Audio, Firewire, e-SATA, and a variety of media cards. The reset button is also hidden here. HTPC cases often are used for displaying photos, and this front port gives you just about every option you could need for doing that.
Dual 80mm fans offer good air circulation. They pull the warm air from the CPU and exhaust it out the back.
This is the left side of the case. As you can see, there is a large fan drawing in outside air to blow across the hard drive cage. There is also a top vent for additional fresh air flow to the CPU.
This is the right side of the case. You cant tell from the grate (or lack of), but there is another spot where an additional side fan can be mounted for additional air flow across the hard drives. 
This is a shot of the bottom of the case. Rubber feet are practically a must on any HTPC case. They don't only look nice, they serve a useful purpose. You can see just how much of a fingerprint magnet the case is, even though the sides and bottom are not mirrored or glossy at all. Detailed Exterior FeaturesWe will take a closer look at some of the detailed exterior features of this case. Many things are cosmetic, but there is a great deal of function designed into this case as well.
Here we see a straight front shot of the front panel open. This handy panel is made out of metal so it feels sturdy, but it has a very prominent bounce when you open it, which makes a racket when it flops down.
You can see the front ports for HD audio, e-SATA, 2xUSB 2.0 and a Firewire port on the left hand side of the case. The reset button is also located here. I like how the reset button is hidden and flush. There is nothing worse than trying to do something and accidentally hitting the reset button.
The media card reader resides on the right side of the case. It supports a large variety of card types as well as another USB port.
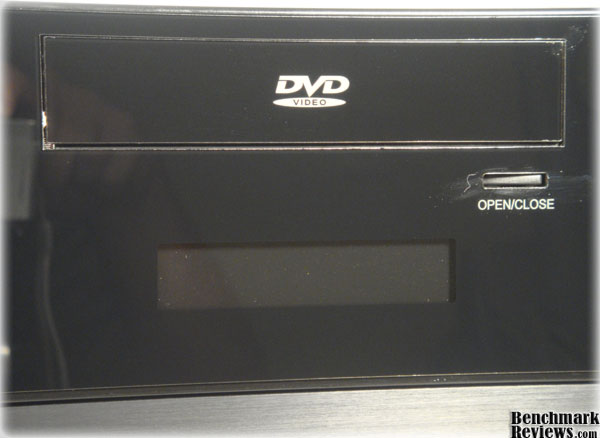
This is where the LCD module would be if you opt to purchase one. It is a two line programmable module that can display things such as the current song or movie playing, as well as many other things. I did not receive one, so I did not have a way to test it out. Also, you will notice the optical drive bezel and button here. I am not sure why they would put a permanent DVD label on the case, for many people have upgraded to Blue-Ray drives for their HTPC. It is purely cosmetic, but I suppose for a layman, it could be confusing. Also, I was a bit leery of the Open/Close button. It did not really line up all that well with my optical drive button, and if I pressed too hard, it would slide off and miss.
I very much enjoy the power button on this case. It is very deceiving, as it looks like a volume knob. The HDD and Power LED are nothing to brag about, they are pretty dim to be honest, but I almost would prefer that while watching movies in the dark. 
Here is a close up of the rubber feet. They can be removed, but they fit nicely with the home theater decor, and also provide protection to the case, and whatever surface you set it on. 
In this picture, you can see the dual 80mm fans that are used for exhaust. Notice the 4 pin Molex connectors on them... yuck. Closer Look: InteriorHere we will take a look at some of the interior features. This is a shot of the empty case with the drive cage installed. The way this cage installs is quite interesting. There are two top screws on either side of it that hold it in place.
Removing them allows the cage to slide slightly back, and then rotate up, and then you can pull it out. This seems like a very useful way to access both the cables connected to your drive, and also the cables in the front of the case that you may wish to reconfigure from time to time. We will see just how that works out once we start installing components.
Here is what the front panel looks like underneath the drive cage. There is plenty of length on the USB headers and whatnot to reach just about any spot on your motherboard. The HD audio header is almost too long, as I had to wind it up a bit under my motherboard.
Here is a better shot of the front panel connections. The only thing missing from here is the optional LCD screen module.
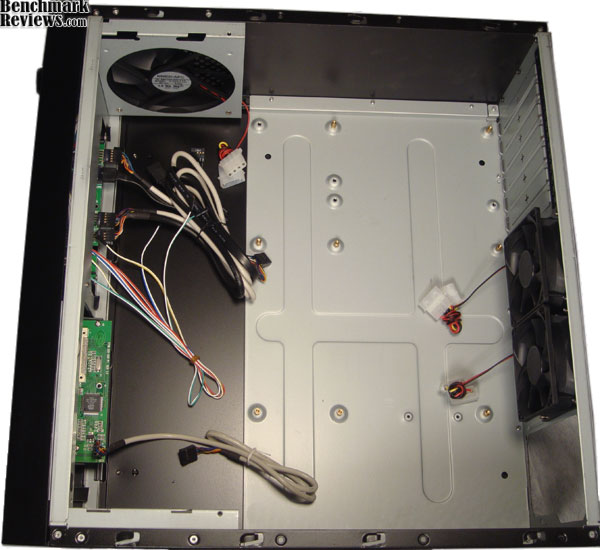
This is a shot of the motherboard and PSU installed. There is a good amount of room in this case with it being able to hold ATX motherboards. See how there is another spot for an additional side-mounted fan on the PSU side, but you will notice there are no appropriate exterior holes on that side, which is confusing. There isn't a great deal of space by where the PSU cords come out, so it was in my favor to have a modular Power Supply. Detailed Interior FeaturesHere is a closer look at some of the interior features and how they function. After loading up the hard drive cage and installing it, the seemingly ample space starts to feel a bit cramped. If you take notice of small detail, you may notice that on the previous pre-installation pictures, the two screws securing the hard drive cage have been moved. There are two mounting points (A and B) that you can use to install the optical drive. It purely depends on your drive and how it fits in there, but one seemed to give me much more maneuverability when installing and removing the HDD cage.
Speaking of the HDD cage, the concept of having it rotate upward is a seemingly good idea, but it does not work as well as I would have liked. I ran into a couple problems with it. When rotating the cage up, if your cables are not long enough, you will have to unplug them, leading to more annoyances when you have to plug them back in while you are trying to rotate the cage back in. Another oversight is the where many motherboards place their SATA connectors. Many SATA connectors are located in the top-left corner of the motherboard (if you are using this image as a reference). When the HDD cage rotates in, it has to be pushed forward slightly to secure it into place. I would up breaking one of the SATA plugs on the end of one of my SATA cables during this procedure because the cage pressed up against all the SATA cords and then had to be slid into place. Not good.
Here you can see the rear exhaust fans. They provide excellent air evacuation from the hot CPU. The problem with these fans is that they have Molex connectors, so you cant use the typical 3 pin connectors on your motherboard to power them. This only adds to the mess of wires in the case. Notice how close the PSU is to the CPU, however. With the GPU, PSU, and Hard Drive cage being all in there, the CPU seems a bit boxed in. This could be further magnified with many of the newer heatsinks on the market today.
Notice the unfortunate method of securing the PCI cards. You have to remove that plastic piece whenever you wish to change out PCI cards. Also, notice the break-out style PCI slot covers. You would think that with custom PC cases being such a commonplace, this type of PCI cover would be practically extinct in favor of removable, reusable ones. Too bad. One redeeming factor is that it can hold full-height PCI cards.
This is a rear shot of the hard drive cage. There is room for 6 hard drives and 1 optical drive. There is definitely a proper order that the drives need to go in, and if you are anything like me, you change your drives around every once in a while. The optical drive and topmost hard drives should be permanent fixtures in your computer. If you want to remove these drives after installing any drives on the bottom, the respective bottoms ones will need to be removed before you can get to the screws holding the top ones in. Depending on how you see it, this can be good or bad. I found it annoying more than anything.
The layout of the way the drives are installed makes sense, but does not leave a great deal of room for wire management. The outmost hard drive cage on either side can be removed to provide more space. This was an extremely nice feature that I made good use of. Removing the outmost two drive cages took care of the SATA cord issue from earlier, and added a lot more room for cable management and air flow. 
Notice the awful rats nest of wires I encountered after installing the hard drive cage. The closeness of the HDD cage to the motherboard paired with the case fans Molex plugs makes power cord management difficult. With so many people using SATA drives, and nMedia recommending SATA drives for this cage, it seems silly to still use those types of power connectors for their fans. It almost seems like an additional inch or so on the depth of the cage would make a world of difference for this situation. nMediaPC HTPC 6000B Final ThoughtsnMediaPC is a company that deals primarily in home theater related products, and it shows. Their HTPC 6000B case has both form and function. It looks good, and has many useful features inside of it. I think there is room for improvement, though. The hard drive cage is a great idea, but I think it could have been a little better executed and thought out. Simple oversights such as the Molex connectors on the fans, and obnoxious break-away PCI covers also take away from the case. However, this is one of the very few cases that I have seen that can take a full ATX motherboard, hold 6 hard drives and an Optical Drive, all while staying at the $100 price point. It is extremely good looking to boot. HTPC 6000B ConclusionPresentation of this case was solid. It came shipped very well, and did not have any damage that I could see at all. Their website shows a lot about this case as well, so it was easy to do research on it. The case came with a nice instruction booklet, as well as a lot of screw and cable management supplies such as zip ties and sticky cable holders. The appearance of this case was quite satisfying to me. I think it is a very attractive case, and it has many cosmetic features that make it a great fit for PC and home theater enthusiasts alike. The construction of this case was not phenomenal, but it did not feel flimsy. There was a few design flaws involving the optical drive button, rackety front panel, and PCI slot covers, but the case still fits within a threshold of being constructed properly. The functionality of the case was hit and miss. There were quite a few flaws in how some of the features actually worked (such as the hard drive cage installation), but they were evenly matched by matched by other features such as removable hard drive mounts. There are quite a few HTPC style cases out there you can choose from, but from a value aspect, I think the 6000B from nMedia is a good purchase. Many HTPC cases can cost close to $300, but this one is listed on Newegg.com for $100. It has many features found on some of the more expensive ones, and even a few that you can't find. To sum up, I think it is a good case, and if the few annoyances are something that can be overlooked, it is worth checking out. Pros:
|
|||||||||||||||||||||||