| CM Storm Scout Gaming Case SGC-2000-KKN1-GP |
| Reviews - Featured Reviews: Cases | |||||||||||||||||||||||||||||||||||||
| Written by Bruce Normann - Edited by Olin Coles | |||||||||||||||||||||||||||||||||||||
| Thursday, 09 April 2009 | |||||||||||||||||||||||||||||||||||||
CM Storm Scout Gaming CaseWhat differentiates a serious Gaming PC from the rest of the PCs hiding quietly under desktops? To me, it's all about graphics performance, but I know there are many who would disagree. They would say it's a combination of factors, including appearance and some extra functionality needed to survive the physical gaming environment. The first thing you notice about the CM Storm Scout Gaming Case is its appearance, particularly the swooping, integrated handle that graces the top surface. That's an obvious nod to the LAN Party setting, so CM Storm is apparently paying attention to the customer's needs there, but what about the rest of the case? The Scout has several other features that are aimed at the gaming market, as we'll see. Cooler Master has created a new division called CM Storm to address the specific needs of gamers. By investing in a brand new business unit with dedicated resources that are focused on one specific market, they are clearly showing a major commitment. Their latest product, introduced at CEBIT in early March, is called Scout: The True Gaming Case, and is aimed at the mid-market enthusiast. It has everything needed for a gaming chassis and nothing more, so it does without a few bells and whistles that the top cases have.
Follow along with Benchmark Reviews and let's see if the Scout (SKU SGC-2000-KKN1-GP) has enough gaming DNA to survive the ruthless natural selection process that takes place in this very demanding marketplace. CM Storm Scout Features
SGC-2000-KKN1-GP Specifications
About Cooler Master
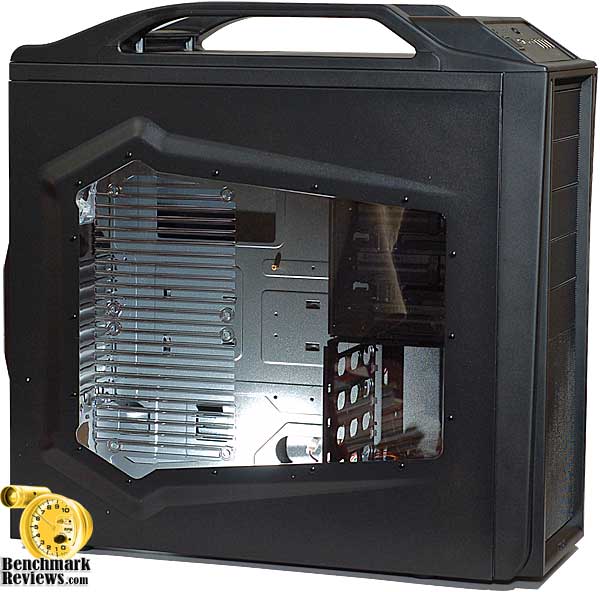
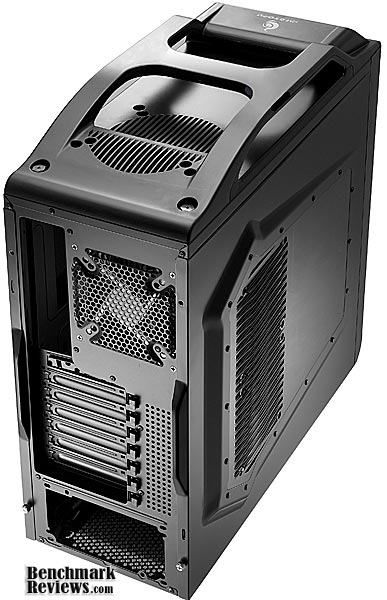
Owning the PC trenches for almost two decades, Cooler Master's veterans present their scars from battles past as claims of triumph over the competition. United with a new generation of eSports athletes and engineers, now marching under the flag of CM Storm, the time has come to reveal truly ground-breaking, military grade hardware for the gaming revolution. Through long-standing research programs, CM Storm is co-developed with the world's most prolific enthusiasts and eSport prodigies. Thanks to intensive testing and continuous feedback, the CM Storm division has been able to encompass and improve upon gamers' needs and their tough to handle scenarios. By working directly with the gaming community, CM Storm has injected Storm Tactics into each and every product we make. Storm Tactics, with a heavily dedicated focus on Strength, Security and Control, will keep your most vital gear fortified and well tuned at all times. Marking a new era for Cooler Master, our fierce Storm Gear stands ready at bay to mobilize and back up your gaming skills. For more information, please visit: https://www.cmstorm.com/ Closer Look: ExteriorThe exterior of the CM Storm Scout is a very attractive matte black, a mixture of steel and plastic. Highlighting the front and left are the full length black mesh front panel and the tinted acrylic side panel. Both of these allow the red lighting from the included fans to shine through, as well as any additional lighting the user adds to the mix. The raised area surrounding the window on the side panel retains an element of Gothic design that has been so popular with the gaming products, but the rest of the case presents a more utilitarian and military/industrial design ethos.
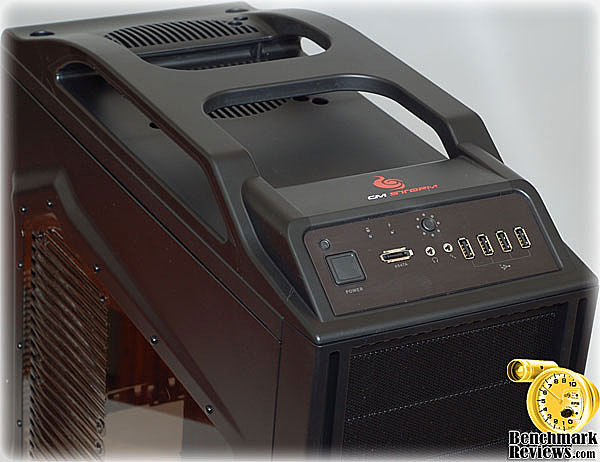
The top of the case is where the eye is eventually drawn. The striking molded plastic handle that graces the top three quarters of the case, forms a visual bridge between the top exhaust grill in the rear and the control panel in the front. Form follows function here, and the physical strength that is on display here certainly fits into the CM Storm design philosophy of Security, Strength and Control.
Let's take a look at the second element of the CM Storm philosophy: Control. The Scout has a combined I/O and control panel, mounted in a very convenient and accessible spot. There are the normal On/Off button, Reset button, Power and HDD Activity LEDs, Microphone and Headphone Audio Jacks, a generous array of four USB ports, and an eSATA port. Additionally, there is a switch to control the LEDs on the front and rear fans, independent of the power for the fans themselves. If you want to control more lights, you'll have to daisy-chain the internal connections, there are no spare plugs provided.
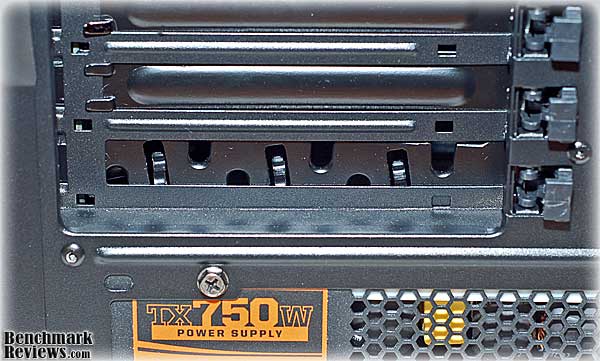
The final element to examine is Security. CM Storm heard from its customers that they are concerned about losing their expensive gaming peripherals; mostly keyboards, headsets, and mice. They came up with a clever, simple fix that's easy to use and doesn't add a lot of cost to the case. It's called StormGuardTM and it's a series of cable loops that are built into one of the expansion slot covers. Simple, cheap, and effective - score one for CM Storm.
Depending on where the PCI-e slots line up on the motherboard, it might makes sense to move it up to the top slot, closer to the I/O points. Since it's just a modified expansion slot cover, this is a simple task. Detailed Exterior FeaturesWhen you first look at an empty PC case, you spend a lot of time looking at both the details and the general appearance of the sheet metal, inside and out. When the case has a side window, especially one as large and prominent as this, the interior and exterior tend to merge into one.
The blacked out interior of the Scout presents an impressive landscape, pleasing to behold. The unfortunate truth is, that pretty landscape is meant to be covered up with high tech construction, and will end up looking like this:
That's why I usually spend just a few moments admiring the surface finish of the interior sheet metal and start zeroing in on the little details right away. We'll look at those in the next two section, but for now let's continue our tour of the exterior. The Scout has a pretty standard airflow scheme, for a newly designed case in this price range, with 140mm fans in front and on top, and one 120mm exhaust fan in the rear. It also has mounting locations on the Acrylic side panel for two more 120mm fans. We'll look at cooling performance in detail later, as it is a critical element of a gaming chassis.
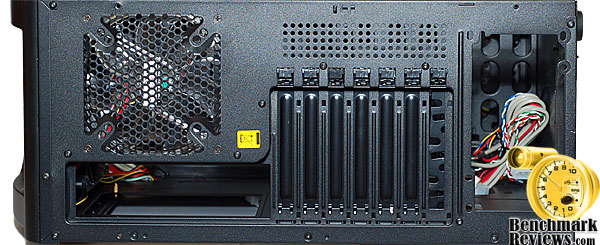
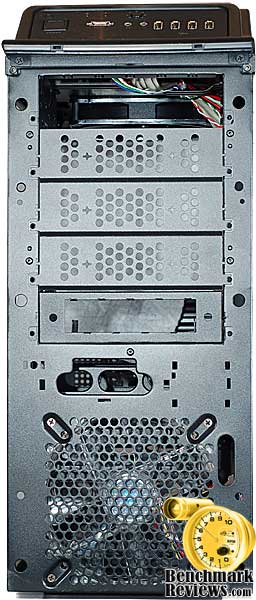
The rear of the case has few surprises, except perhaps the ability to mount case fans smaller than the supplied 120mm unit. I cannot imagine why anyone would want to do this; perhaps one of our readers will enlighten me in the Benchmark Reviews forums. The PSU mounting location is evident from this view; it's on the bottom, an increasingly popular location. There are some vent holes beside the expansion slots. There are no particular provisions for water cooling; not to say you can't do it, but it'll be an old school effort.
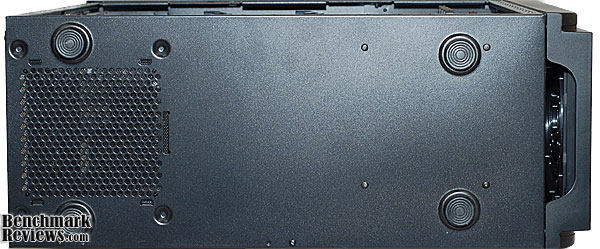
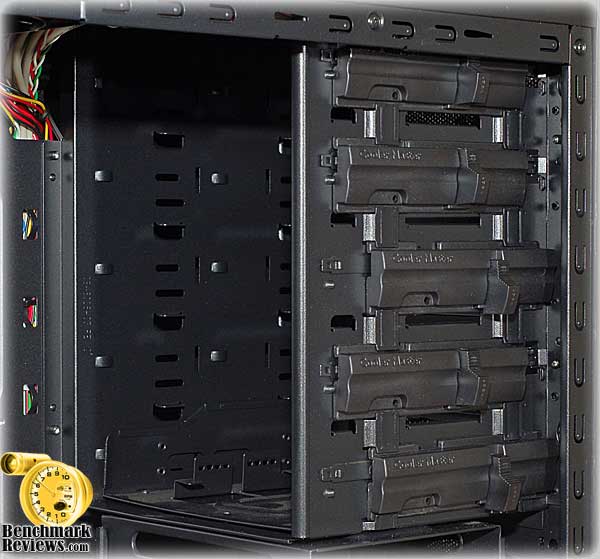
The bottom of the case shows vents front and rear; we'll take a closer look at these vents when we look at the interior of the Scout. The feet, which are fairly rigid, are clearly designed for mobility and durability, rather than cushioning. They also are easily replaced, not being held in place with adhesive, but a mounting stem that snaps into the chassis. Closer Look: InteriorOnce the side panel is removed, by removing two thumbscrews and sliding the panel a bit towards the rear, that beautiful landscape I mentioned above becomes easier to see and appreciate. Some of the highlights are obvious: full black interior, full tool-less mounting hardware, the massive cutout on the MB tray for CPU cooler mounting backside access, a wide open drive bay offering the potential for good airflow from the front-mounted fan, stiffening sections in the MB tray. So far, so good.
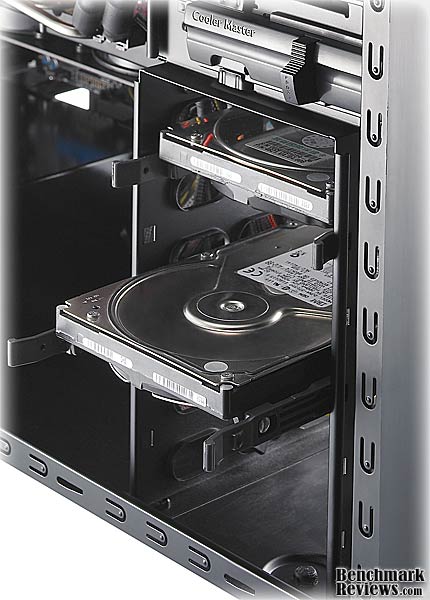
The HDD bay is a simple affair, riveted in place at the bottom front of the case, directly behind a 140mm intake fan. It is well ventilated, which is a good thing, since in the stock configuration, this is the only intake fan. But, if you fill it up with 4-5 drives, you should really add one or two of the side panel fans as intakes.
The drives slide in on thin plastic guides, which are attached, individually on either side of the HDD. If you've ever had a Dell, you know what I mean. In 2009, though, we don't use screws to fasten the guides to the HDD; there are two metal pins on each guide to mate up with the threaded mounting holes on the side of the HDD. Don't worry about the guides falling off, though. CM Storm designed just enough of a mismatch in hole locations and just enough compliance in the soft elastic mounts for the pins, so that the guide snaps into place and is held there. This is design engineering at its best, providing a required function (guide stays in place) without any extra parts, simply clever hole placement.
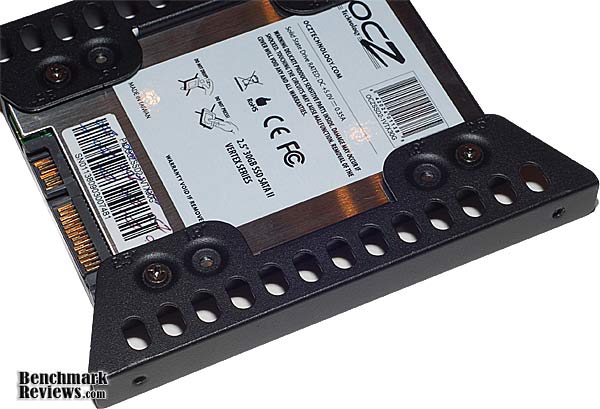
SSDs are becoming very popular with gamers, who value the faster load times; it can be a real competitive advantage. The basic HDD guides supplied only work with standard 3.5" drives; a special adapter is required if you want to install one of the new crop of SSDs that only come in 2.5" format. I've been able to modify some of the drive caddies on other cases to accept the little SSDs, but the "stick" adapters that come with the Scout can't do that trick. The adapter is two small metal plates that screw to the bottom of the SSD and extend out to the normal width of a 3.5" HDD. It will also accept a 1.8" SSD if needed.
The motherboard tray is non-removable, a given at this price. That doesn't prevent CM Storm from offering up a highly requested feature, though. There is a generous cutout behind the CPU location, providing easy access to the CPU cooler mounting hardware. As coolers have become larger and heavier, and as manufacturers have recognized the benefits of higher clamping pressure and the need to provide some structural backing to the motherboard to prevent deflection, more CPU cooler suppliers have started using mounting schemes that require access to the back side of the motherboard. This was a major pain if you wanted to change the CPU or the CPU cooler, since you had to remove the motherboard to do it. Not with this case.... Thank you CM Storm for listening to your customers.
There is a filtered vent on the bottom surface to allow cool air to enter the PSU, and then get exhausted out the back by the fan in the PSU. Most units, either with the fan on the rear surface, or the typically larger fan on the bottom surface, will be able to take advantage of this arrangement. This is a short, easy path for cool air to get in and warm air to exit. If the user desires, there are alternate mounting holes for the PSU that allow it to be mounted "upside down", if they want to change the airflow direction.
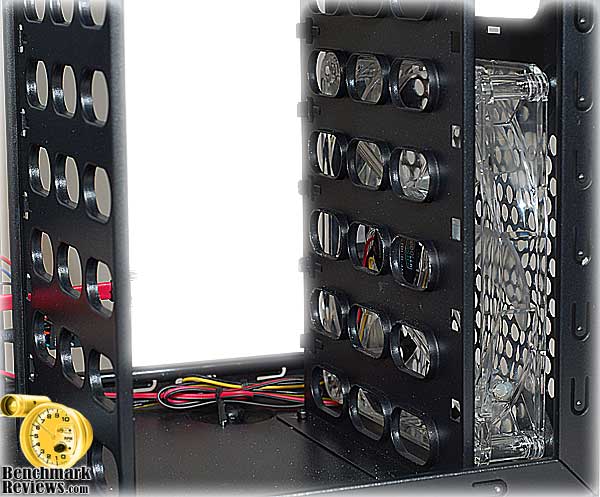
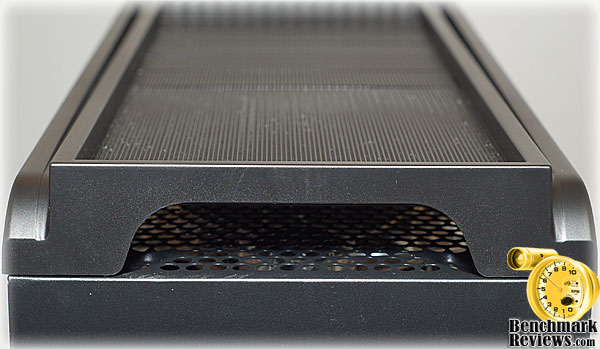
The single threaded hole on the rear upright in the photo above is for mounting a padlock hasp that can be used to securely lock up the side cover. The hasp is included in the accessory kit that's supplied with the Scout, and fits through a mating slot in the side cover. The front bezel of the CM Storm Scout is easily removed, revealing the external drive bays and the front fan mounting holes. For those who missed it, I just said "EASILY removed"; thank God for small favors, eh? The 140mm mounting holes are occupied by the stock fan, and 120mm fans have their own set of holes. In contrast to the multiple mounting holes in the rear, where the maximum allowable fan size is 120mm, this set makes sense. There are a vast number of 120mm fans available on the market, which a user might prefer to the supplied fan. I question the necessity of partially shrouding the intake of the fan with the array of vent holes. I can't envision this case being used without the fascia in place; perhaps the large hole at the bottom is big enough for someone to get their finger into.
The RF shields on drive bays 2-4 help keep the Scout FCC compliant. Cooler Master used to ship cases with all bays covered, but I guess someone reasoned that 99% of all cases have at least one optical drive installed, so they can ship the cases out with one less RF shield. Hey, every nickel of production costs counts for at least 25 cents of retail price. Let's not waste money, energy, or resources providing parts that go unused.
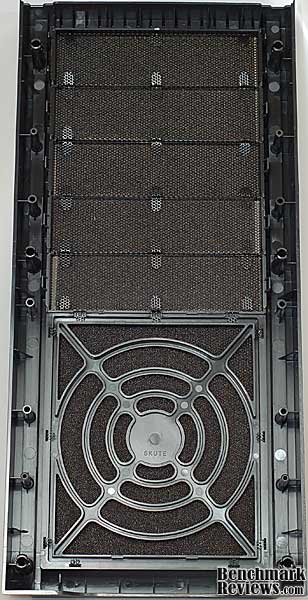
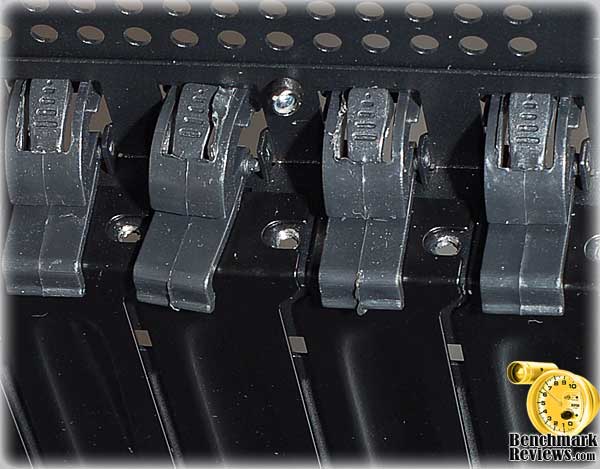
The fascia is a molded plastic affair, and foam filters are laid into its panels on the entire front surface. Although, strictly speaking, they can be removed and cleaned, they are not really designed to promote routine cleaning. I guess you could just take the whole fascia and run tap water from the faucet through the various openings. Some of the intake air will come through here and get filtered, at least for the first six months after the filters are cleaned. Detailed Interior FeaturesThe tool-less 5.25" drive bays on the Scout feature a new design that certainly fits in with the CM Storm design scheme. Sliding the lever forwards engages pins into the mounting holes on the drive. Once the lever is all the way forward, the locking knob can be slid downwards, securing the mechanism in place. It seems quite secure, as a bit more force was required than is usual, and is not likely to come loose while transporting the case.
The tool-less expansion slots are secured with a plastic latch that rotates up and towards the rear of the case. The basic design is not new; I first saw it on the Cooler Master CM690 I bought a few years ago. What is new is the poor quality of the molded plastic latches. One of them was disconnected from its pivot hole when it arrived. I pushed it back into place, but it never really worked as well as the others, it was always straining to disconnect itself again. I received an early production unit, direct from the factory in China, so there is a possibility that the QA team will sort this out. There is always the option of using old fashioned screws to hold the cards in place, and if I was transporting the case on a regular basis, I would definitely install them.
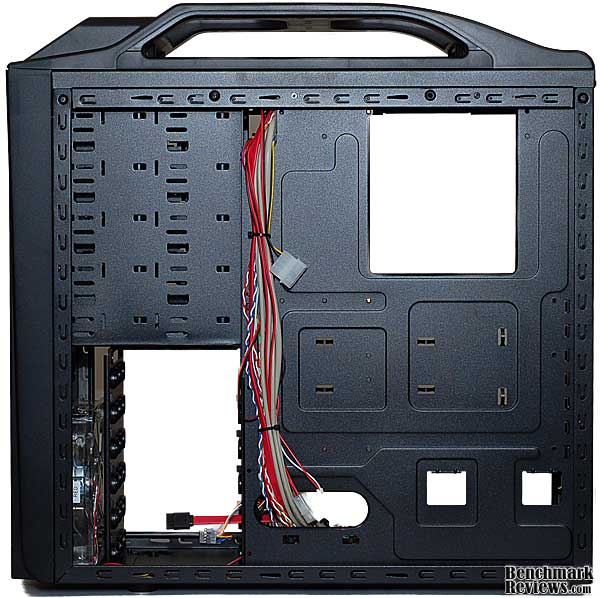
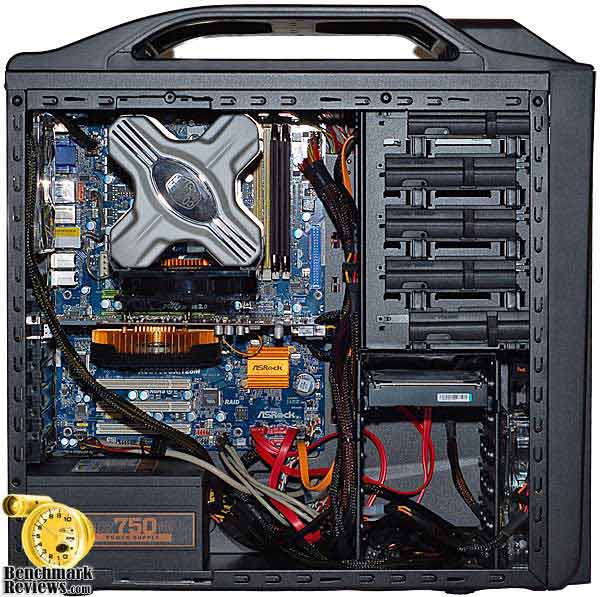
The Scout is a midsized tower case, a good 1-1/2 to 2 inches smaller in every dimension than the CM Storm Sniper that Benchmark Reviews looked at earlier this year. One thing that suffers in this smaller format is cable management.
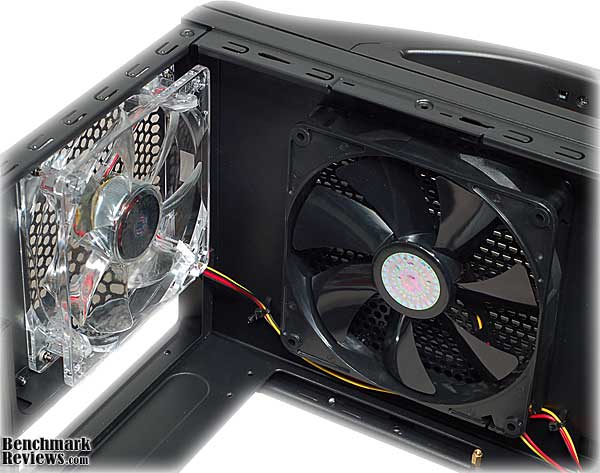
While the Sniper allowed all the major power cable to be run on the backside of the motherboard tray, the Scout is 35mm narrower and does not have access holes in the right places. That said, there is a decent sized open area to the right of the motherboard where the cables can be run, and neatly tied down to well spaced cable tie points. The 12V cable for CPU power was out of luck though, and had to be run across hill and dale. Scout Cooling PerformanceThis section will concentrate on cooling, as it's such a critical element for a gaming case. If CM Storm is going to go out on a limb and call the Scout: "The True Gaming Case", it had better have above average cooling performance, or at least the features necessary to achieve a high level of cooling performance with some component upgrades. The CM Scout, in its base configuration from the factory, has three fans installed. The fan in front of the HDD drive bay is a 140mm unit of clear construction, with red LEDs shining through the blades. This is the only fan configures as an intake, and there are two main paths on the front of the case for air to get to it. At the bottom of the fascia is a large rectangular cutout, which allows intake air to bypass the filtered areas and enter the case. This is a good thing, if the filters get dirty and clogged, which mine always seem to do.
The rear fan, a 120mm unit of clear construction, is mounted in the usual location next to the I/O panel. This is generally a good location for an exhaust fan, as it pulls heated air directly out from the CPU and Voltage Regulator area. Some tower-type CPU coolers can be mounted with their fan opposite this rear fan, providing a mild version of push-pull airflow through the heatsink.
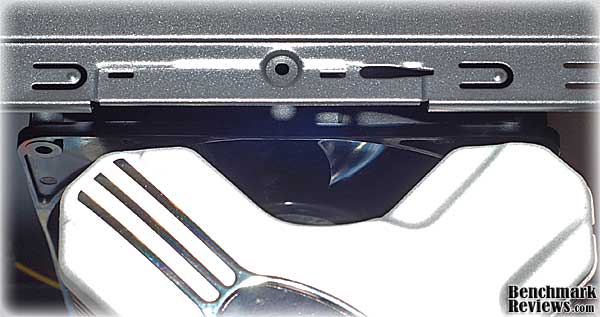
The CM Scout has one more 140mm fan, standard black construction, without lighting effects, fitted to the top surface and pulling air out of the case. Once again, exhausting heated air from this area of the case is a good thing. One, heat rises, so an exhaust on top is more efficient. Two, the CPU and memory are both located near the top and getting the heat out before it spreads to the rest of the case is a good strategy.
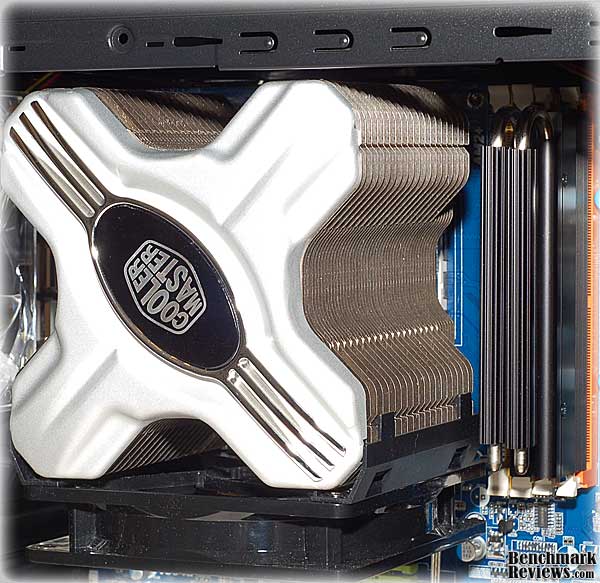
As you can see in this photo, there is minimal clearance between the monster Hyper Z600 CPU cooler and the upper fan. It couldn't be any closer unless you mounted it on the heatsink itself. One of the few available locations for the fan that ismounted to the heatsink is on the bottom, blowing air upwards, so there is a short direct path for air to pass over the fins of the heatsink and leave the case immediately. With smaller heatsinks and horizontal, low profile types a different airflow strategy may prevail.
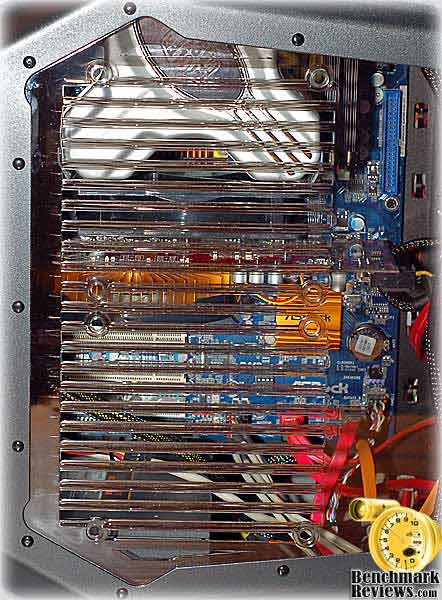
The ATI 4850 GPU is a thermal beast. It can overwhelm the reference cooler if stressed too hard and too long. Fortunately, many video card manufacturers have bitten the bullet and installed more capable GPU coolers on their products. Unfortunately, most of the coolers do not exhaust the heated air from the case, they just heat everything else up that's around them. This is where the side mounted fans come in. Typically these are configured as intake fans, and in this case, where the stock configuration is (1) 140mm intake, and (1) 140mm plus (1) 120mm exhaust; it makes sense to add an additional 120mm intake fan to balance the pressure. There are two mounting locations on the side panel for 120mm fans, one directly above the other. The top one would work well to bring cool air to a horizontal, low profile CPU cooler. It is most likely going to be unusable with any of the vertical tower-type CPU coolers, no matter their size. The massive Cooler Master Hyper Z600 CPU cooler leaves absolutely no room for a fan in the upper location, and one could argue that none is needed.
The lower mount works well for bringing cool air to the video card(s). Adding one to my test setup brought the loaded temp of my 4850 down by 6 degrees C. There is a potential design problem here, though. Once installed, the bottom edge of the fan approaches the side of the PSU. I didn't have any actual interference, but was using a very modest PSU here, the Corsair TX750W, which is 5.9"(W) x 3.4"(H) X 6.3"(L). This is only slightly larger than the ATX standard and towards the lower end for a gaming rig PSU, so be aware that neither of these two side panel fan mounting locations may be usable, depending on what CPU cooler and PSU you decide to use. We'll see a little later how much of an impact that could have on component temperatures. Cooling performance is one thing; it affects how high you can overclock your system and how long it will live, but noise performance is another matter. Noise has a personal effect, and not a positive one. It sneaks up on you and attacks without warning, one minute you're fine, and the next you're whining, growling and rumbling. Oh, wait. That's the fan whining, not you? So sorry... The Gaming and Overclocking communities contain a lot of people who are absolute connoisseurs of cooling fans; for some, it's a religion. I admit to dabbling in these waters, but I'm not a registered member yet. Nevertheless, I feel comfortable in saying: this is not a quiet case, at least with the fans that are supplied. Add in the fact that at least one side fan is probably needed to supply fresh air to the GPU(s) and you have a situation where headphones would be a welcome addition to the gaming experience. CM Storm Scout Testing & ResultsTesting the cooling performance of a case is not that difficult, but it is time consuming. It takes a long time for component temperatures to reach steady state. They'll get to within a degree or two within 10 minutes, but they continue to climb, almost imperceptibly, for 3-4 times that long. It's not that any one component is getting that much hotter; it's the combined effect of all the components feeding off one another that causes the slow rise to the final maximum temperature. For the load tests, I used a mix of applications that I've used for benchmarking in the past and I'm familiar with how they stress individual components. No one application gives the maximum load for all components, so the load temps reported here are the maximum each piece of hardware reached during the testing. For comparison, I pressed the SilverStone FT01BW case into service. It's a similar case, with the same basic layout, size, and fan arrangement. The FT01BW is a bit more upscale in its design and materials, and priced accordingly, but they share a similar architecture, if not the same target audience. Both cases were tested with the same hardware and software configuration. Cable management was optimized for each case, based on the internal layout and features available. Note: I used a different set of hardware the last time I tested the SilverStone FT01BW, so the results are not comparable. Test System
Benchmark Applications
Enclosure Test Products
Results Neither of the cases tested have fan controllers, the fans were run at 100% speed for all tests. The SilverStone FT01BW did not have the option of adding a side panel fan, the CM Storm Scout did, and I tested it in both configurations. As I mentioned earlier, there was no clearance for a fan in the upper side position on the Scout, but the lower position could be used to feed cool air to the video card(s). All temperatures are reported as measured, in degrees Celsius, and the ambient temperature for all tests was 24C. Let's look at the results:
The idle temps were about 2 degrees higher for the CM Storm Scout, across the board. The load temps tell another story. The CPU cooler worked quite well with the quasi push-pull fan arrangement, using the top fan as an exhaust. The top fan on the SilverStone is an intake, and this didn't work as well, giving up 5 degrees to the Scout. The GPU and Northbridge temps were within 2 degrees, with the Scout trailing, until the side-mounted 120mm fan was added to the mix. This was clearly what the doctor ordered for the Scout, reducing temps 6 degrees for the GPU and 8 degrees for the NB. These are excellent results and they show that CM Storm made the right decision to offer the option of adding one or two side fans. With CrossFireX and SLI GPUs heating up the typical gaming case, this is the only configuration to consider. Just for the record, I've had a side-mounted fan installed in my Cooler Master CM690 for forever. Even though I've optimized that highly configurable case for low noise office use, I couldn't pass up the cooling benefits of a side fan. CM Storm Final ThoughtsCooler Master has invested a lot of energy into creating the CM Storm brand. I'm not sure why they thought they couldn't serve the gaming market with their existing corporate structure, but they obviously felt that setting up a dedicated division was beneficial. They haven't entered into this by halves; their web presence at https://www.cmstorm.com/, their links to several gaming teams, support of KODE5 - Global Gaming Revolution, and various gaming competitions, is solid proof that they are paying a lot of attention to their customer base.
Marketing is not on my top five lists of professions that I admire, but that's just because I've mostly seen it done poorly. When I see CM Storm looking like they are actually trying to create a partnership between the company and its customers, I'm a bit sad that I've never worked at a company that "gets it", to this degree. The CM Storm product line now consists of two "statement" products, both echoing military themes: Sniper and Scout. These are not just ordinary military themes, these are iconic badges, usually worn quietly by those with the mental toughness to go it alone, get the job done, and get home alive. I somehow doubt they will ever launch a product called "Huey"; as iconic as that tough old bird is, it doesn't fit the mold. Now, "Predator", that's another story; a modern, cyber version of both scout and sniper, it's got the goods to play in this game.
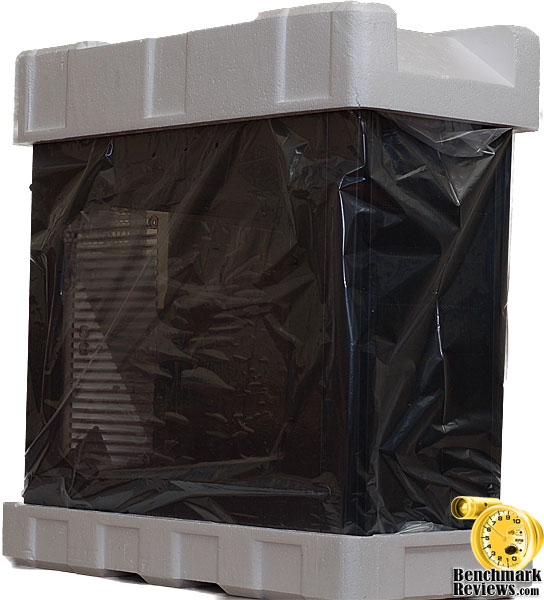
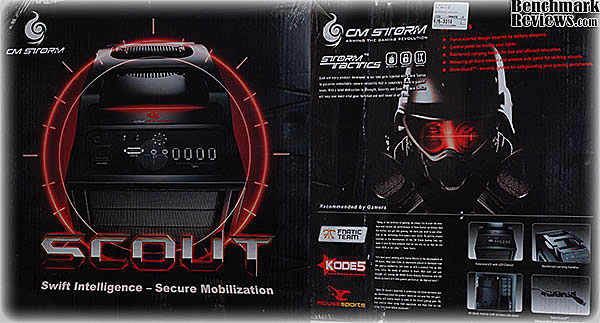
CM Storm Scout ConclusionThe keywords that CM Storm chose for the Scout Gaming case are: Swift Intelligence - Secure Mobilization. The first mobilization mission this particular Scout had to undertake was to get from China to Washington DC alone, without the protection of 27 other Scouts that usually travel together on a pallet, or the relative safety and camouflage of a discrete, brown outer box. The Scout reported for duty in a package that was a little beat up and worn. You can see some of the corners have collapsed, and a substantial crease on the rear surface.
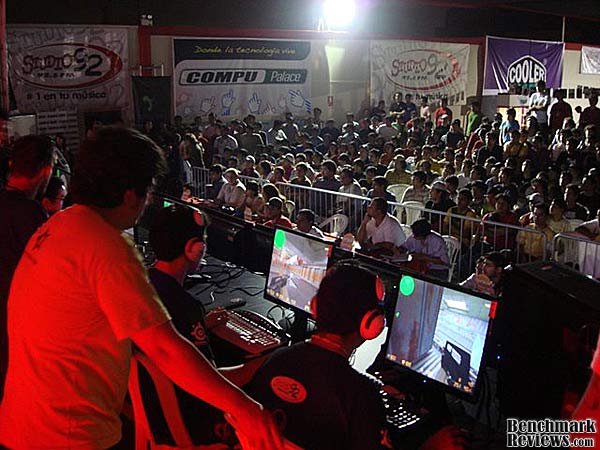
The graphics are very striking, as you can see; it'll be hard to miss this package in the retail shops. Not every feature is called out or pictured, but the photos are large and clear, so you can see most of what you need to know by looking for yourself. All the text is multilingual, which (in my parochial American ways) I usually dismiss, but CM Storm is mounting a very strong international presence for the brand, with events in Latin America, Australia, Serbia, Peru, and Mexico, in addition to the usual European and North American venues. The internal packaging was adequate for the normal distribution channel, but not what I would have specified for individual shipping. The Styrofoam end caps were a bit smaller than I've seen on some other cases, meaning that there was precious little space between the outer box and the product. There was no additional material used as protection for the sides, excepting the standard plastic bag. Nevertheless, there was nary a scratch on the Scout as I removed it from the packing. Sometimes it's better to be lucky than good, they say. Once released from the packaging, the Scout lives up to its name, in terms of appearance. The military design theme is not some cheesy copy of past hardware; it's a modern, functional construct. It doesn't try to look good, there's no other school of design represented here except Form Follows Function. Some people use that credo as an excuse for a quick and sloppy effort, but a thorough examination of functional requirements always suggests an organic shape that looks right. I'd say, whoever designed the Scout got it right.
Once a design takes shape, it's time to flesh out the details. This is a different kind of design activity, and it's one where the pressures of cost always exert the most leverage. Not surprisingly, it's the construction of an item that most often leaves people disappointed. For the most part, the Scout survived this step; only a couple issues keep the construction details from being a total success. The quality control on the expansion card hold down tabs was out to lunch, as we saw in the interior details section. This is an easy problem for both the manufacturer and the user to fix. The second issue may not be a deal breaker for most gamers, but I was put off by the noise of the cooling fans. I know Cooler Master can produce quiet, good performing fans; the one supplied with my old Hyper 212 is an example, so I have to guess that airflow and cost won out over quietness. Fair enough. The cable management was not as well developed as the rest of the case details, but it was serviceable. End of issues, as far as I'm concerned. I have to give the CM Storm Scout an A+ for functionality. The well designed handle on top, the convenient control panel, the cooling performance, the CPU cooler mounting access, the easily removed fascia, the StormGuardTM for securing expensive gaming peripherals, the included 2.5 drive caddy; as I said in the introduction, "It has everything needed for a gaming chassis and nothing more, ...". This is a clear benefit from Cooler Master's decision to fully engage and partner with a very specific customer base. The only thing I really wanted, that it didn't have, was full filtration on the intake fans, something you have to step up to the CM Storm Sniper to get. Some may wish to see better support for liquid cooling, but it's a reasonable bet to leave that out of a case in this price range. Value is a bit difficult to assess, as the SGC-2000-KKN1-GP SKU is just going on sale this week, and editors don't have firm pricing information as of yet for the Scout. Industry rumors point to a price near $100, or a little less, we'll have to wait and see. With all the functionality and construction quality that I've outlined, this seems like a reasonable price. It's not going to be a massive bargain without serious rebates, but you won't go wrong buying a good quality product from an established manufacturer. If you've read this far, you don't need me to tell you that I think this case is a winner. The CM Storm brand may be heavy on Marketing, but it's being used in the service of the customer. Their second offering, Scout: The True Gaming Case, is a solid companion to their first, the Sniper. Pros:
|
|||||||||||||||||||||||||||||||||||||


Comments
I would have liked better cable management though.
$7.99 at cmstore.coolermaster-usa.com/
Also available at performance-pcs.com for the same price.
It IS one of the nicest adapters out there, IMHO.